This document describes how to test your cosmetic item in game and see it on the character you are creating it for. It assumes you have already created your item following the KF2 Cosmetic Item Tutorial
Step-by-step guide
- Open the SDK.
- File > Open and browse to <Your Drive Steam is Installed on>\Program Files (x86)\Steam\steamapps\common\killingfloor2\KFGame\BrewedPC\Maps\SDK.
- Open ItemTest_<Character Name>.kfm that matches the character you are creating the item for. For example ItemTest_DJScully.kfm if you are working on Scully.
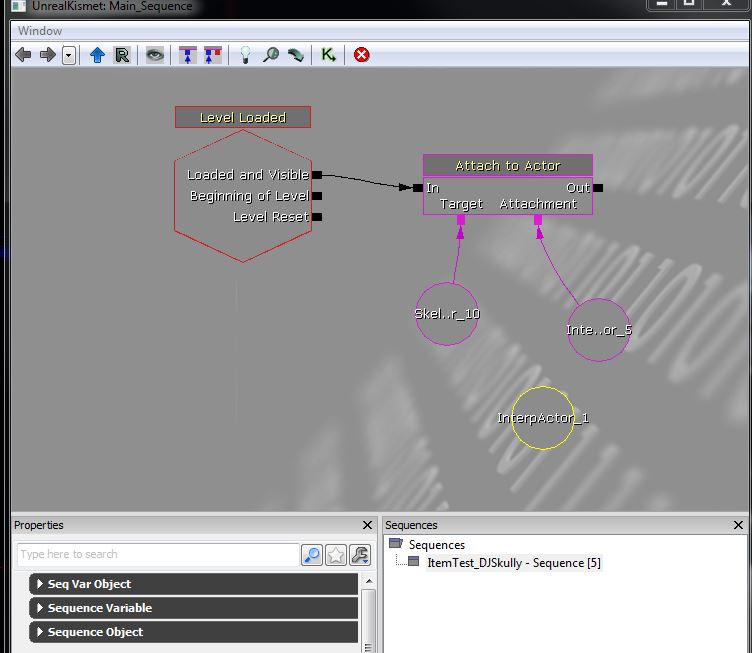
- It should look something like this:

- Open the content content browser and find the static mesh of the item you created earlier. I'm going to test the DJHeadphones:

- With the static mesh selected in the content browser, rightclick on the ground and select "Add InterpActor: <Your asset name> to add it to the level. It's very important you place as an InterpActor or your item will not attach to the character:

- With your mesh now placed in the level, open Kismet by clicking on the Kismet icon:

- With kismet open, go back to the level 3d view and click on your item to select it.
- In the Kismet workspace, with your item selected, right click in the workspace and click "New Object Var Using InterpActor_1":

- This will add your interp actor as a variable in Kismet:
- Right click on the purple box below "Attachment" on the Attach to actor node and select "Break Link To" the existing link:
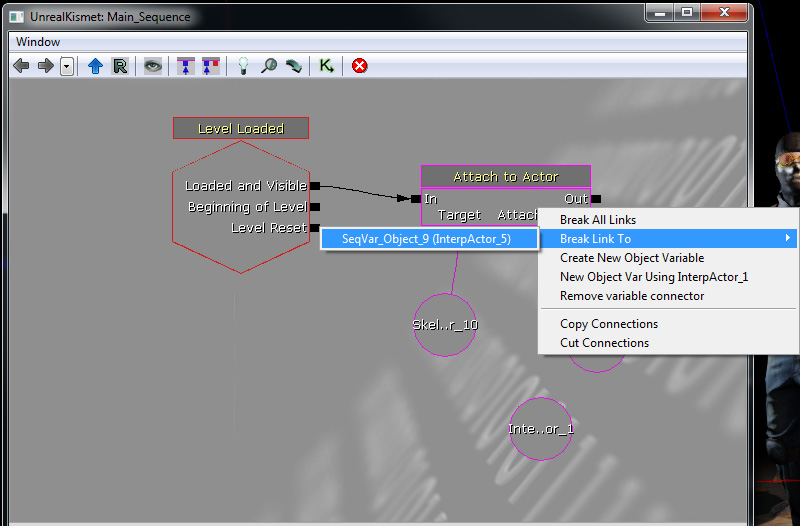
- Once the link is broken, left click on the same purple box below the Attachment and drag a line to your new item interp actor variable.
- You can delete the old variable that was previously connected if you want.
- Close Kismet.
- Click the "Play this Level in editor Window" button to test your item in game:

- If you created your item correctly and followed this tutorial correctly your item should be attached to the animated character like this.

| Info |
|---|
Related articles
| Filter by label (Content by label) | ||||||||||||||||||
|---|---|---|---|---|---|---|---|---|---|---|---|---|---|---|---|---|---|---|
|
...