This tutorial will go over how to create a custom weapon and add it to the trader for use in your custom game mode. In this case, we are going to make the Swat MP7 an incendiary weapon that cross perks with the fire bug.
The steps involved:
- Create the damage type
- Create weapon definition
- Define the weapons so that the whole weapon class does not have to be loaded when accessing info.
- Create UI icon
- Displayed in trader and weapon inventory
- Create the weapons class
- Contains all info and logic for the weapon. This is the weapon.
- Import into trader
- Included in trader ARCH so that users may purchase the weapon, purchase ammo and sell the weapon.
- Create mode to use trader
- The trader is assigned in the default properties of the KFGameReplicationInfo as TraderItems.
- Test the mod
Create the Damage Type
The damage type is what contains the damage values as well as the effect in which they apply. In the case of the incendiary ammo, we are going to applying stumble and a fire dot. We are going to piggy back off the DoT that the Trench gun uses for this turorial. This can be seen in the property, BurnDamageType. We assign this value to KFDT_Fire_DragonsBreathDoT. However, if one so chooses to, that class can be extended to modify the damage there. The burn power is how much damage is going to be applied per interval on the damage over time.
//=============================================================================
// KFDT_Fire_MP7
//=============================================================================
// A damage type for KFWeapn_SMG_IncendiaryMP7
//=============================================================================
// Killing Floor 2
// Copyright (C) 2015 Tripwire Interactive LLC
//  - Zane 5/29/2017
//=============================================================================

class KFDT_Fire_MP7 extends KFDT_Ballistic_MP7
	abstract
	hidedropdown;

// Damage type to use for the burning damage over time
var class<KFDamageType> BurnDamageType;

/** Allows the damage type to customize exactly which hit zones it can dismember */
static simulated function bool CanDismemberHitZone( name InHitZoneName )
{
	if( super.CanDismemberHitZone( InHitZoneName ) )
	{
		return true;
	}

	switch ( InHitZoneName )
	{
		case 'lupperarm':
		case 'rupperarm':
		case 'chest':
		case 'heart':
	 		return true;
	}

	return false;
}

/** Play damage type specific impact effects when taking damage */
static function PlayImpactHitEffects( KFPawn P, vector HitLocation, vector HitDirection, byte HitZoneIndex, optional Pawn HitInstigator )
{
	// Play burn effect when dead
	if( P.bPlayedDeath && P.WorldInfo.TimeSeconds > P.TimeOfDeath )
	{
		default.BurnDamageType.static.PlayImpactHitEffects(P, HitLocation, HitDirection, HitZoneIndex, HitInstigator);
		return;
	}

	super.PlayImpactHitEffects(P, HitLocation, HitDirection, HitZoneIndex, HitInstigator);
}

	/** Whether this damage type can apply damage over time */
static function bool CanApplyDamageOverTime( out int InDamage, out class<KFDamageType> KFDT,  optional Controller InstigatedBy )
{
	// Overriden to specific a different damage type to do the burn damage over
	// time. We do this so we don't get shotgun pellet impact sounds/fx during
	// the DOT burning.
    KFDT = default.BurnDamageType;
    return KFDT.default.DoT_Type != DOT_None;
}

defaultproperties
{
	BloodSpread=0.4
	BloodScale=0.6

	KDamageImpulse=350
	KDeathUpKick=120
	KDeathVel=10

    KnockdownPower=0
	StumblePower=21
	LegStumblePower=21
	GunHitPower=12

	// Even though with do DOT in a different class, we still
	// Need burn power here for the initial incap from the pellet
	// hit
    BurnPower=5.0// 5

	CameraLensEffectTemplate=class'KFCameraLensEmit_Fire'
	EffectGroup=FXG_IncendiaryRound
	BurnDamageType=class'KFDT_Fire_DragonsBreathDoT'  //borrow this from the trench gun

	//Only two perks can be assigned in this list at this time.
	ModifierPerkList(0)=class'KFPerk_Firebug' //primary is firebug
	ModifierPerkList(0)=class'KFPerk_Swat' //secondary perk is Swat
}
Create the Weapon Definition
The weapon definition is a lighter weight class that contains information to be loaded in the trader so that we do not have to load all the class animation, icons and other properties. Otherwise we would be out of memory in a heartbeat. In order to get a weapon into the trader this class must be made. However, this class can be skipped if we do not ever plan to purchase ammo for, sell or purchase this weapon via the trader menu.
In the weapons def we define:
- Which class to load
- WeaponClassPath
- The icon to use
- ImagePath
- The price to purchase the weapon
- BuyPrice
- The price for ammo
- AmmoPricePerMag
- SecondaryAmmoMagPrice
In addition, this class handles logic to get localization. These can be overridden to hard code weapon names.
KFWeaponDefinition::GetItemName()
KFWeaponDefinition::GetItemDescription()
//=============================================================================
// KFWeaponDefintion
//=============================================================================
// A lightweight container for basic weapon properties that can be safely
// accessed without a weapon actor (UI, remote clients).
//=============================================================================
// Killing Floor 2
// Copyright (C) 2016 Tripwire Interactive LLC
//=============================================================================
class KFWeapDef_IncendiaryMP7 extends KFWeaponDefinition
	abstract;

static function string GetItemName()
{
	return "Incendiary MP7";
}

static function string GetItemDescription()
{
	return "This is a fire version of the MP7 made in the tutorial";
}

DefaultProperties
{
	WeaponClassPath="ExampleMeleeWeapon.KFWeapon_SMG_IncendiaryMP7"
	ImagePath=""

	BuyPrice=650
	AmmoPricePerMag=26


	EffectiveRange=70
}
Create UI Icon
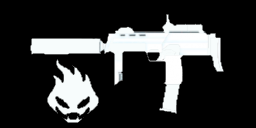
If we want to be able to tell the weapon apart from the base one, we are going to need an icon. If you do not want to make one, just use a program like Paint.net to turn the black into alpha on the example given here: Figure 4.1
Next we need to open the editor to import our icon.
- Click Import in the Content Browser
Figure 4.1
We are extending existing weapons to modify current functionality in order to have the properties we want.
Related articles
