FLeX Setup
This document will cover how to set up NVidia FLeX for Killing Floor 2.
It should be noted that using this system and indeed setting it up REQUIRES that you using a FLeX compliant card. For Killing Floor 2 it is recommended that you have a NVIDIA 970/980 GTX to get maximum results but the 770ti will run it on low.
Content Browser Settings
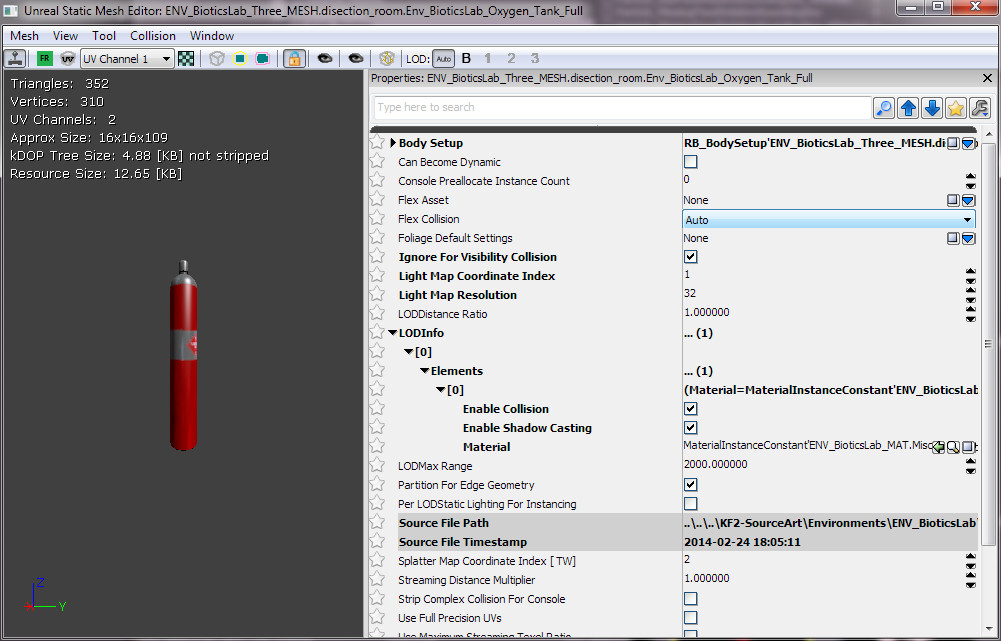
Using the above asset as an example, the asset has a low triangle count. On the right side there is Flex Collision drop down. The options are Auto, On and Off. When the default option of Auto is set, the drivers/engine will attempt to find the best fit for the flex collision based on if the poly count is low or if it has a collision primitive already. If it has a collision primitive, FLeX will use it as it's collision model. If it does not, however, then it will try to use "per poly" collision. If you set an asset to have Flex Collision ON it will implicitly attempt to use per poly collision. If you have Flex Collision OFF it will ignore the asset altogether.
If you are using the public SDK (Editor) you will not want to change any of the settings in the brewed packages that TWI ships with the game. I added this information for assets that are newly generated in the public SDK.
In-Map Settings
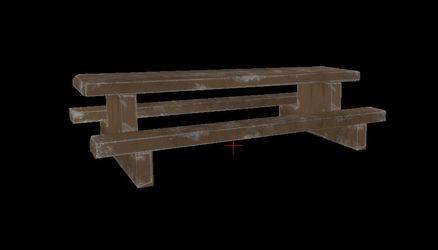
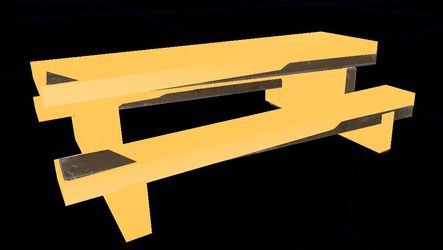
I am going to use this picnic table for my example. I will go through step by step as to how to set it up to collide right with NVIDIA FLeX.
In the image below, we show the collision hulls and how it will collide in the work with pawn interaction. This is not ideal for FLeX collision because one would expect the FLeX particles to collide with the visible geometry.
First thing to do, is to turn off the FLeX collision on the picnic table. See the image below to see where the property to turn it off is found. Be default the Flex Asset field is checked, simply uncheck that and the picnic table will no longer collide with FLeX.

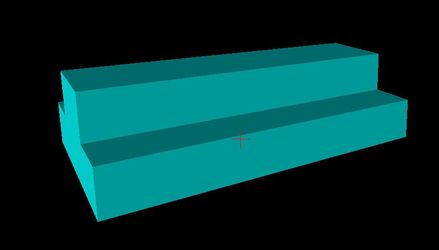
The next part, we will use a basic engine primitive, the box, to make a simplified FLeX collision hull. We just modify the DrawScale3d properties to get the size we need.
We will use this asset to make the hulls:
- StaticMesh'EngineMeshes.Cube'
For easier visualization inside the editor we use this material:
- MaterialInstanceConstant'FX_Lighting_MAT.Glowstick_Military_Light_MIC'
There are a number of settings that HAVE to be set in order for it to work right:
Collision
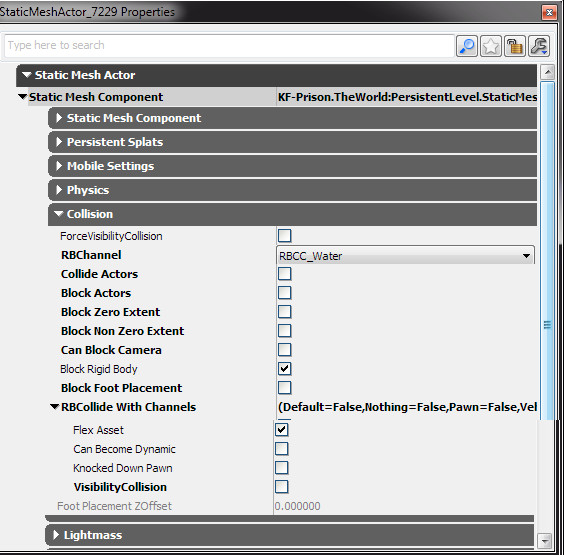
Turn off collision but keep the Flex Asset flag checked
Display (Visibility)
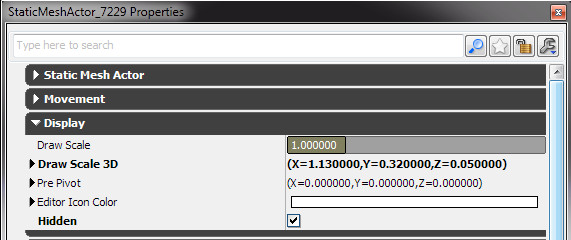
Check Hidden to hide it in game
Advanced (Physics Level Usage)
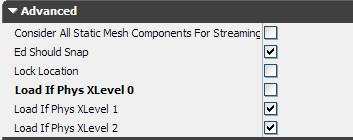
Uncheck Load if PhysXLevel 0 (turned off), leave checked Load if PhysXLevel 1 and PhysXLevel 2
After that, you should be good to go. We usually put the FLeX collision assets in a group so we can hide them when working on the map in general. We usually do the FLeX collision pass last so the art is in a fixed location by that time.
Best Practices
- Turn off FLeX collision on StaticMeshActors that FLeX will never interact with such as small objects, high ceilings.
- Turn off FLeX collision on BlockingVolumes unless the blocking volume has a better collision model than the mesh it is covering
- Test the environment often using the commands in the Debug Commands below
- SetBind J nvspawnflex 5 head
- Search other maps that use the asset to see if it already has a FLeX collision pass for it, if so, use it!
Debug Commands
Testing
nvspawnflex n [bone name = head] = Spawn a flex-enabled effect at your location from a specified bone
0 = Random, 1 = Obliteration Explode, 2 = Spine Jet, 3 = Bloat Explode, 4 = Siren Scream, 5 = Bloat Barf
Visualize
pxvis flex = Toggles debug visualization for Flex particles
pxvis flexforcefields = Toggles debug visualization for Flex forcefields.
pxvis flextriangles or pxvis flextris = Toggles debug visualization for Flex collision gathered by Flex (flex has to be active to see anything).
Stats
stat flexgpu = Flex GPU stats.
stat flex = Flex CPU stats
Flex Static Triangle Count
You can see this stat in "Stat Flex GPU"
This number must be kept under 32k at any given point. This can be managed by optimizing the collision flex uses.